


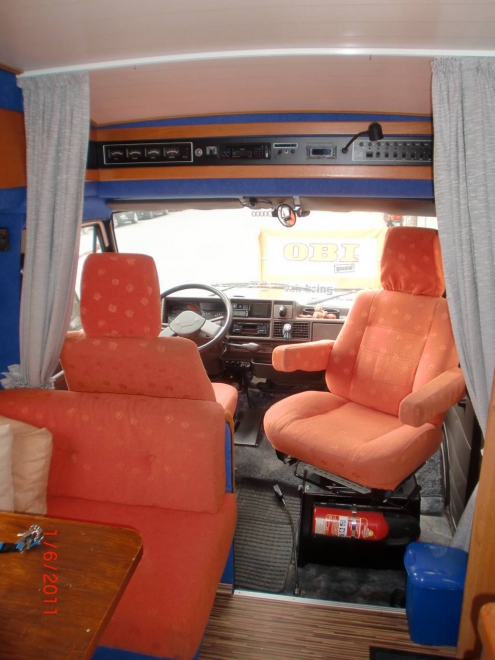
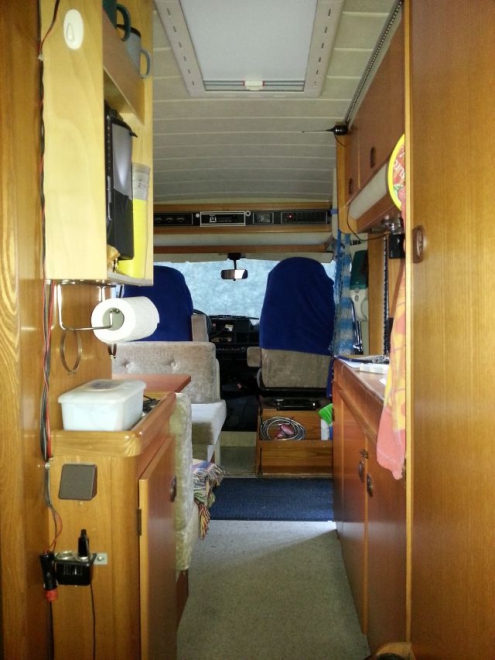
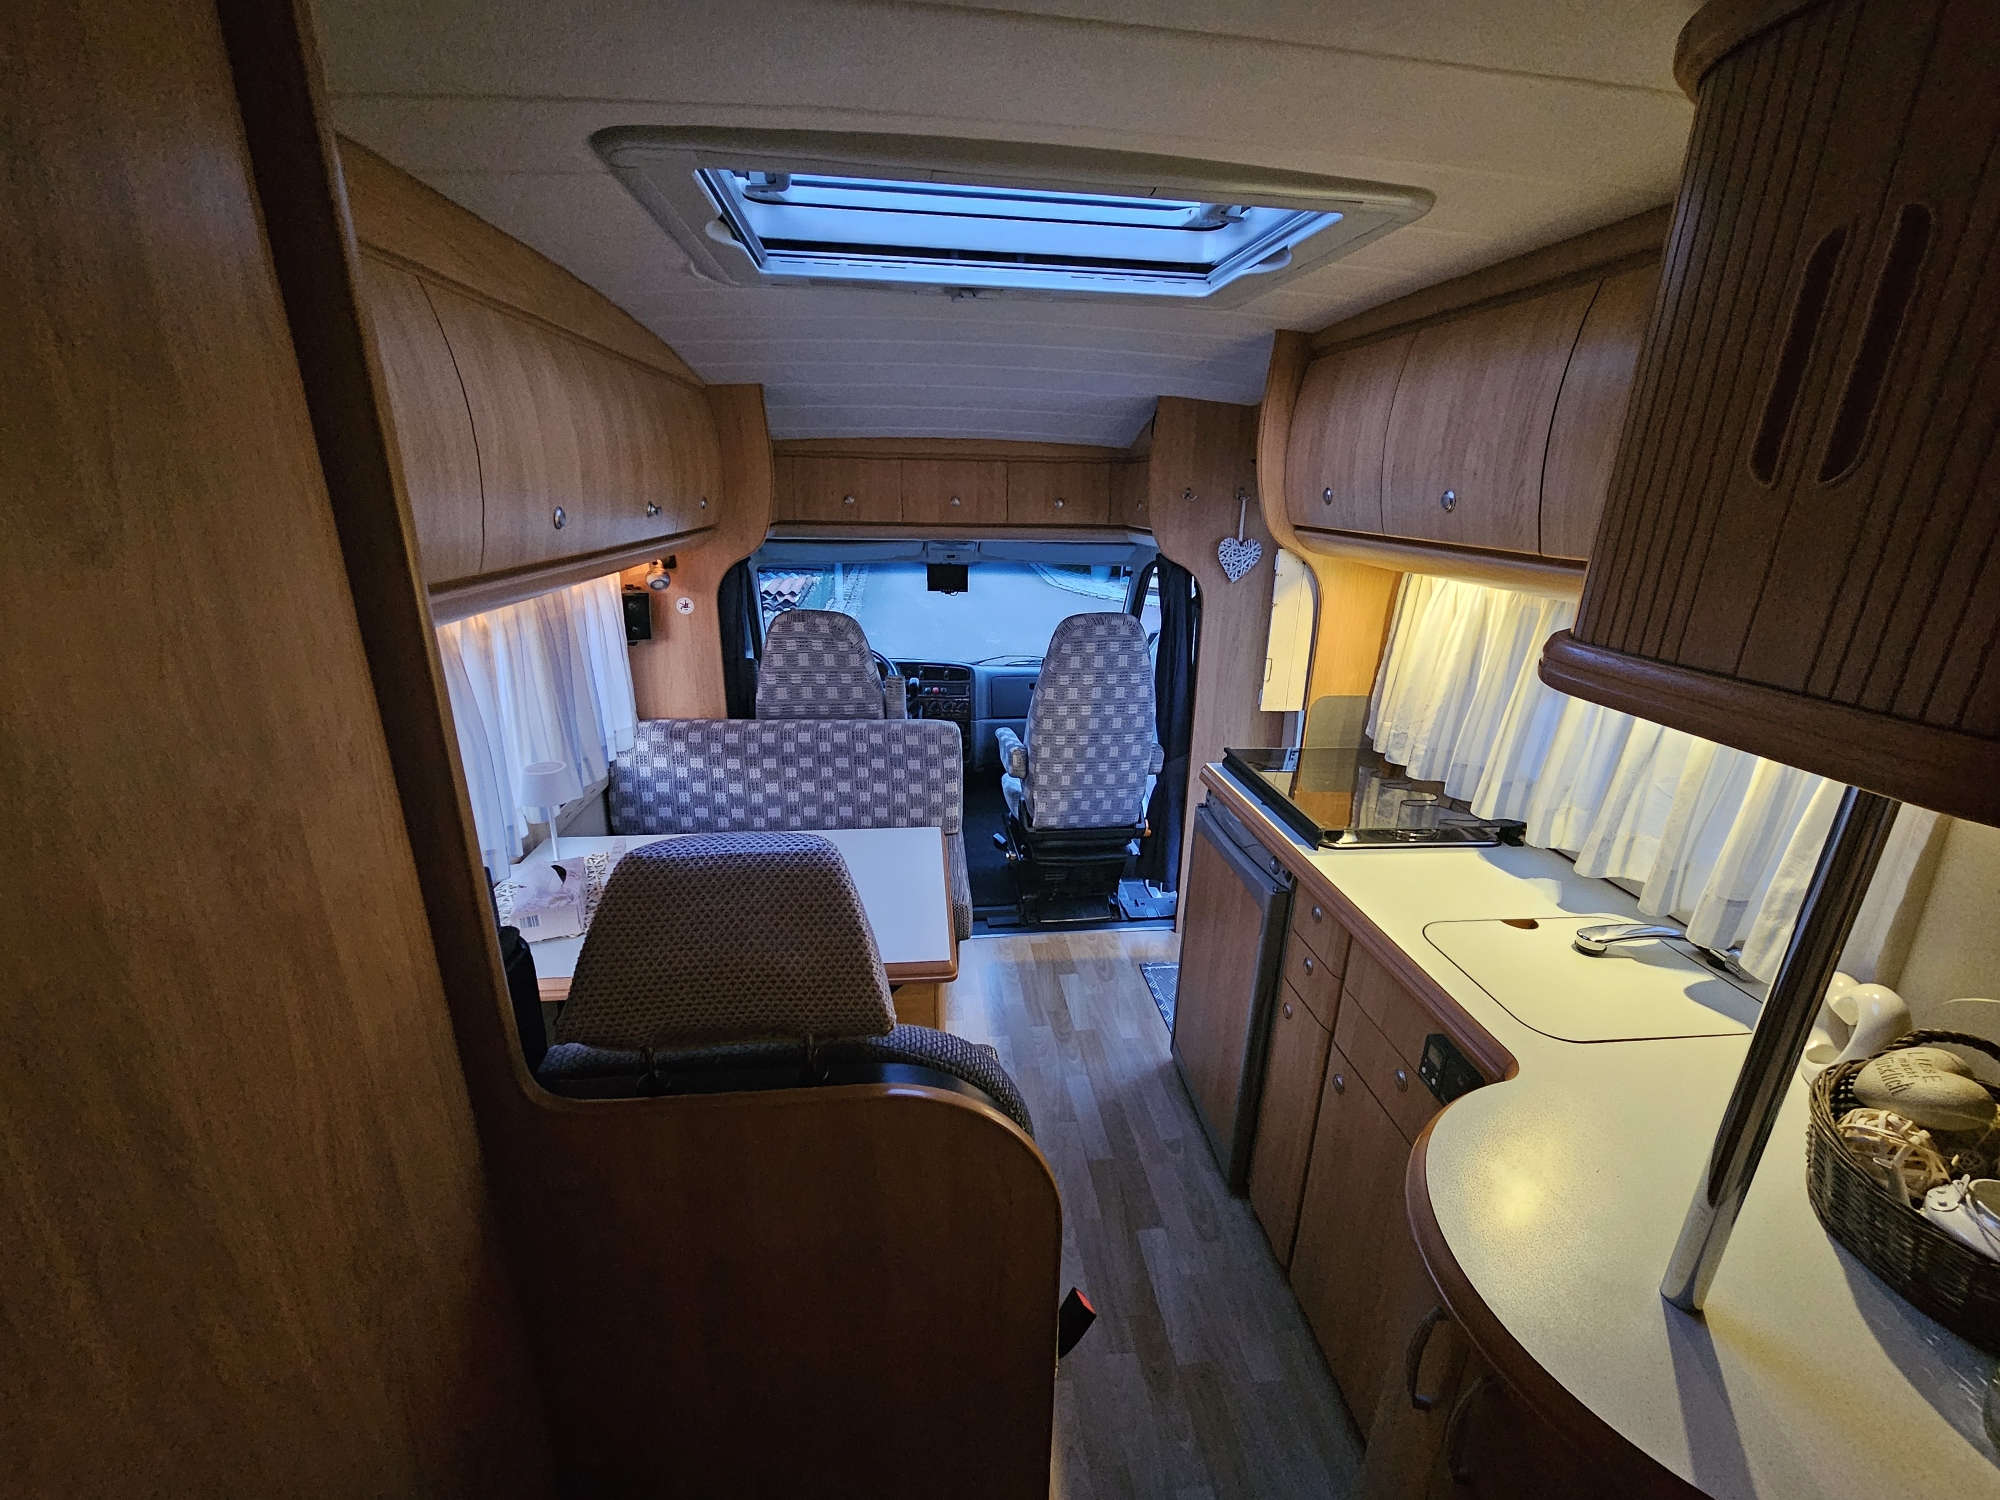
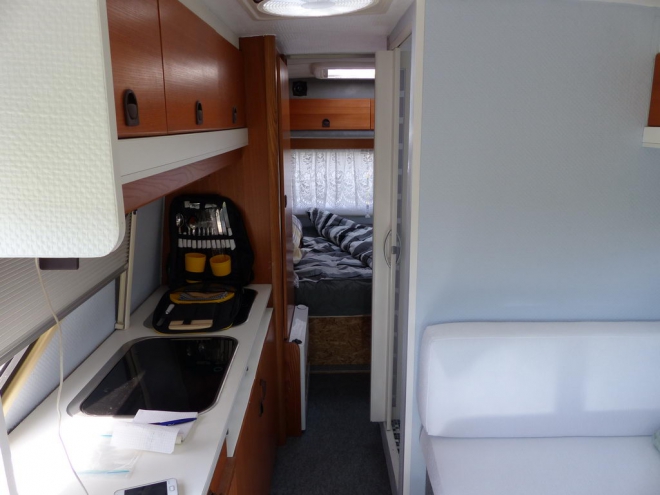
Charging the main battery
- dsj1979
-
 Themenstarter
- Offline
- Routinier
-

- Beiträge: 109
- Thanks: 6
Re: Charging the main battery
26 Jan. 2014 16:20
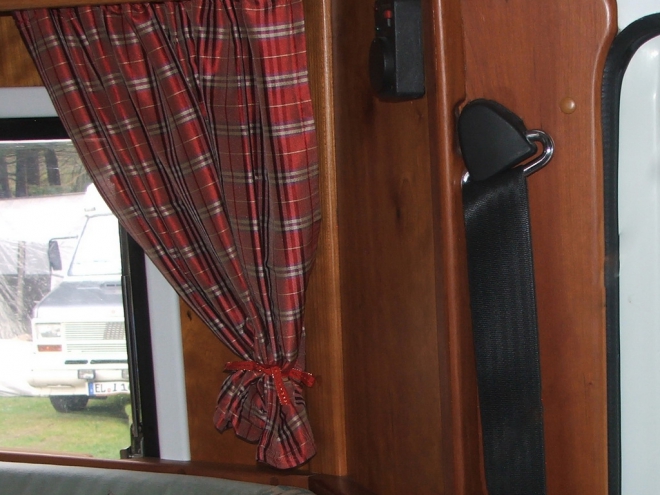
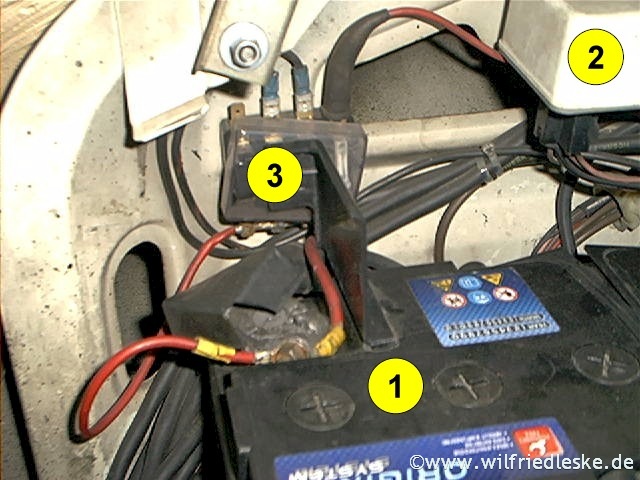
Ok, I think we're getting there! There was a black wire following the battery lead you pointed out. This black wire led to 'D Lichtmasch' on the control box under the seat. I don't know what 'D Lichtmasch' means as translators don't seem to understand it. But.. I disconnected this wire and hey presto, ignition on and the batteries are NOT connecting!!! YAY!!! :daumen2:
This black wire was connected to the glow relay, so would connect the batteries when the ignition was on. Now, do I now connect the black wire to the alternator output; I assume it would only connect the batteries when the engine is then running?
Many thanks,
Daniel
This black wire was connected to the glow relay, so would connect the batteries when the ignition was on. Now, do I now connect the black wire to the alternator output; I assume it would only connect the batteries when the engine is then running?
Many thanks,
Daniel
Antworten zu dsj1979
- Lollo_C
-

- startklar
- Administrator
-

- Hobby 600_Umbau
- Beiträge: 6143
- Thanks: 2978
Re: Charging the main battery
26 Jan. 2014 16:32
Hallo Daniel,
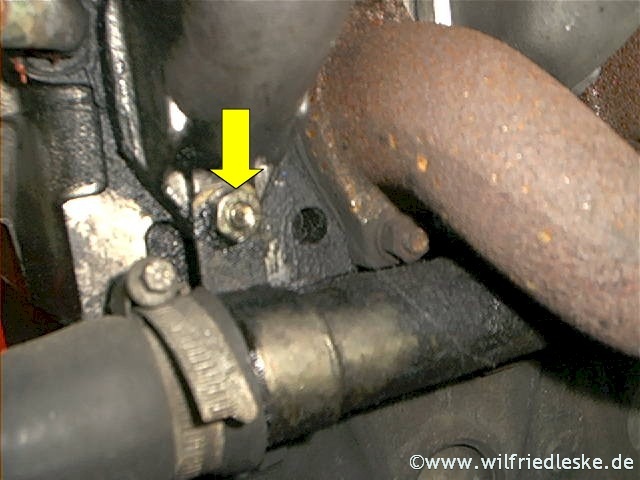
das eine Ende der schwarzen Leitung hast Du gefunden :daumen2: . Wo endet denn die schwarze Leitung im Motorraum? Mach am besten mal ein Foto.
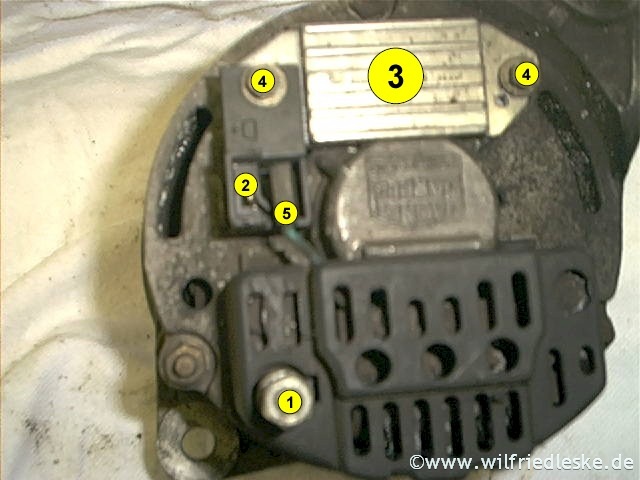
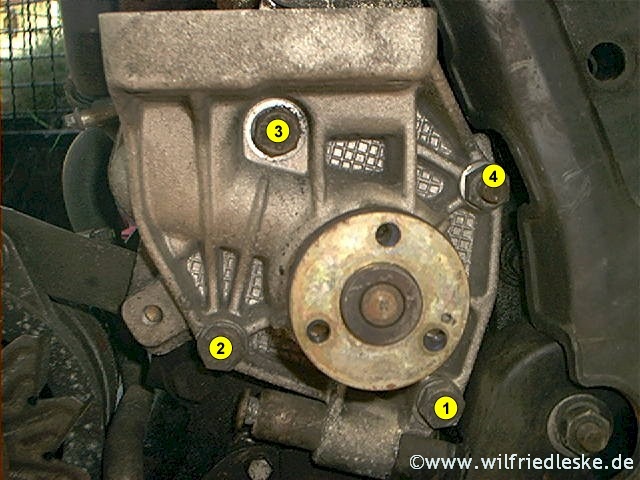
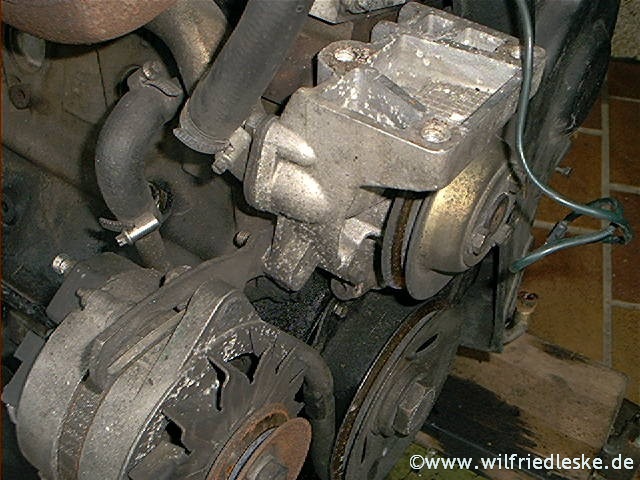
D+ ist eine Klemme an der Lichtmaschine, die erst dann Spannung (+12V) bekommt, wenn die Lichtmaschine = der Motor sich dreht. Bei Peugeot haben aber nicht alle Lichtmaschinen diese Klemme. Deshalb bitte ein Foto!
das eine Ende der schwarzen Leitung hast Du gefunden :daumen2: . Wo endet denn die schwarze Leitung im Motorraum? Mach am besten mal ein Foto.
D+ ist eine Klemme an der Lichtmaschine, die erst dann Spannung (+12V) bekommt, wenn die Lichtmaschine = der Motor sich dreht. Bei Peugeot haben aber nicht alle Lichtmaschinen diese Klemme. Deshalb bitte ein Foto!
Mit freundlichen Grüßen und Glückauf
Wilfried
Ich komme aus der alten Schule. Daher antworte ich nicht auf Fragen, die ohne Anrede und Gruß gestellt werden!
Wilfried
Ich komme aus der alten Schule. Daher antworte ich nicht auf Fragen, die ohne Anrede und Gruß gestellt werden!
Antworten zu Lollo_C
- dsj1979
-
Themenstarter
- Offline
- Routinier
-
- Beiträge: 109
- Thanks: 6
Re: Charging the main battery
26 Jan. 2014 16:52


Hi,
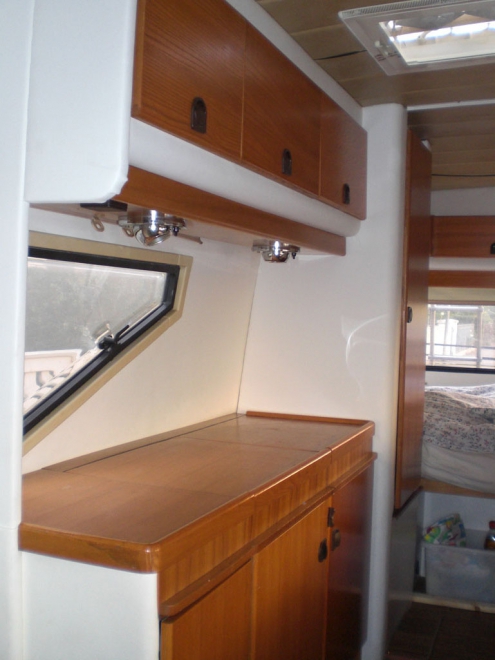
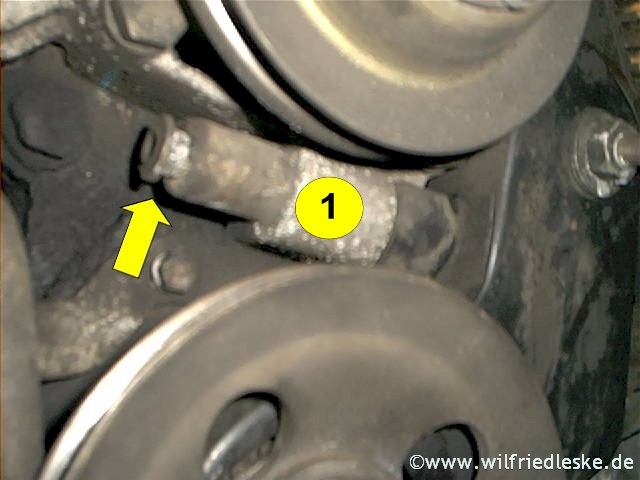
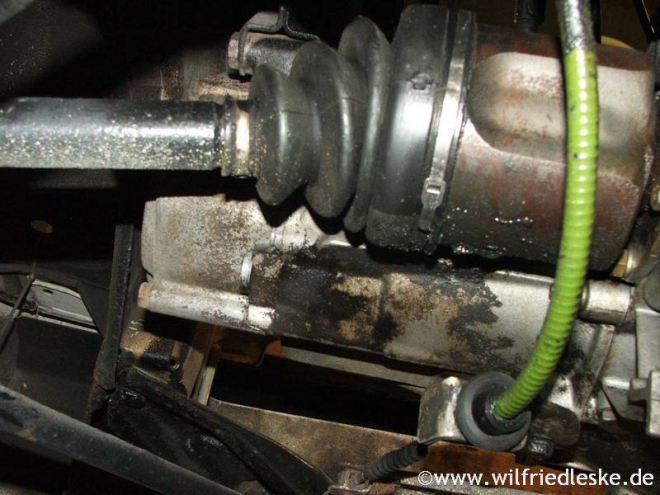
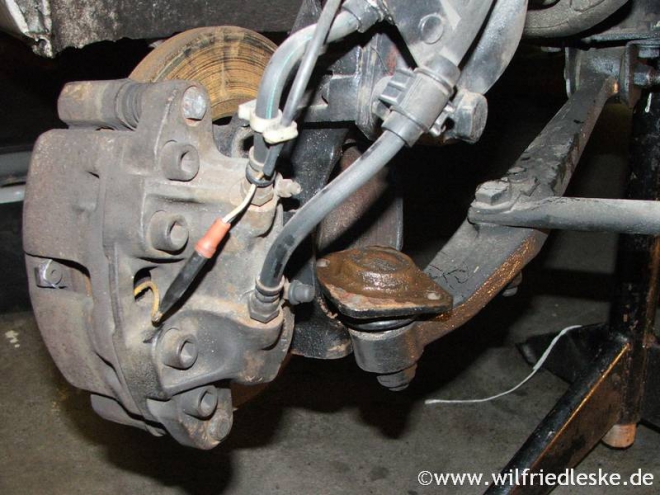
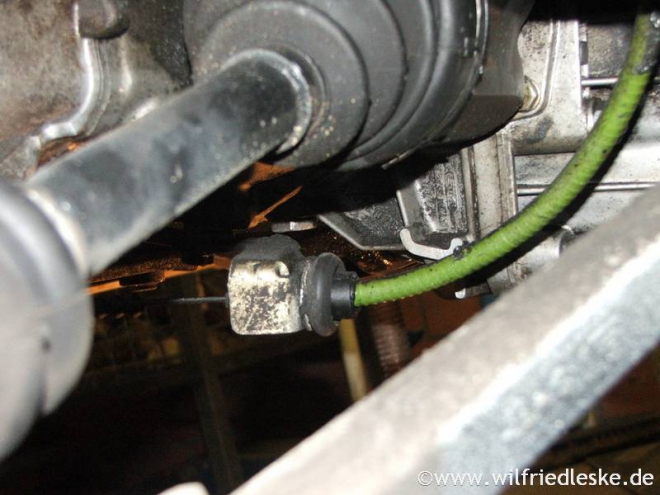
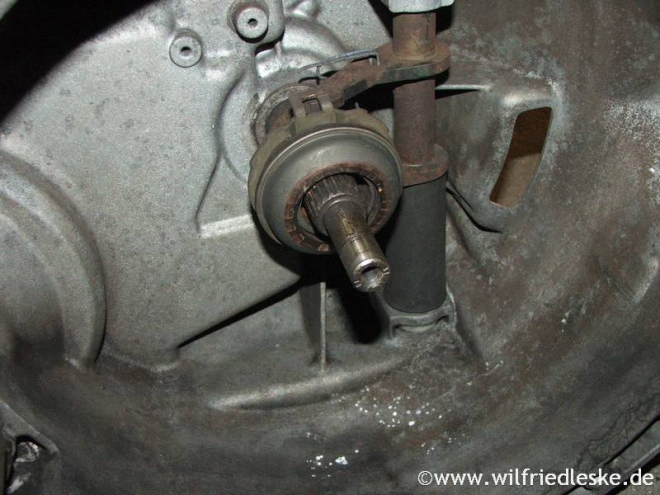
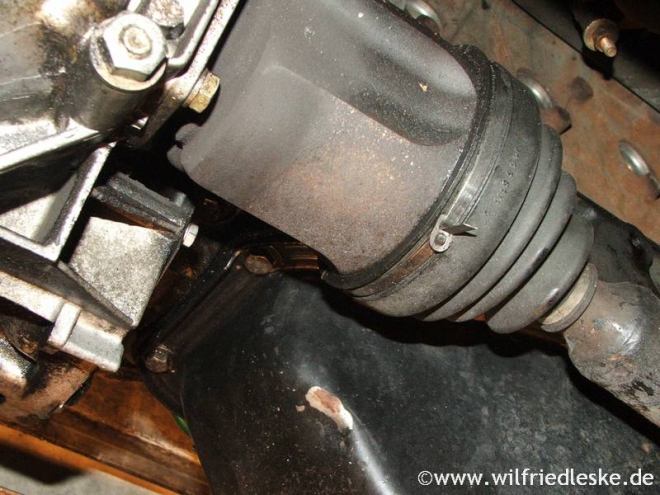
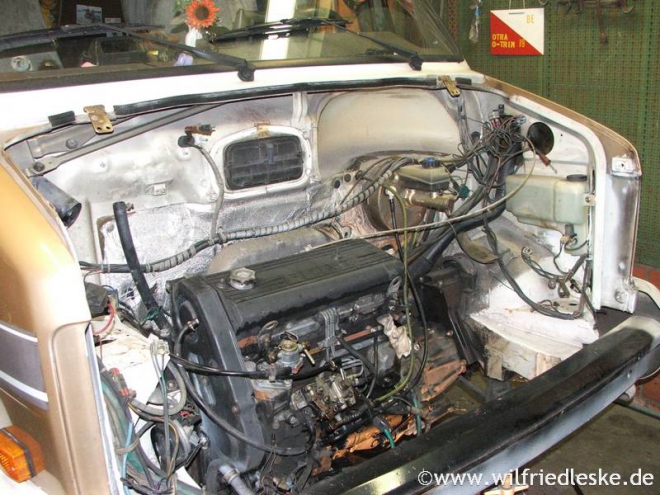
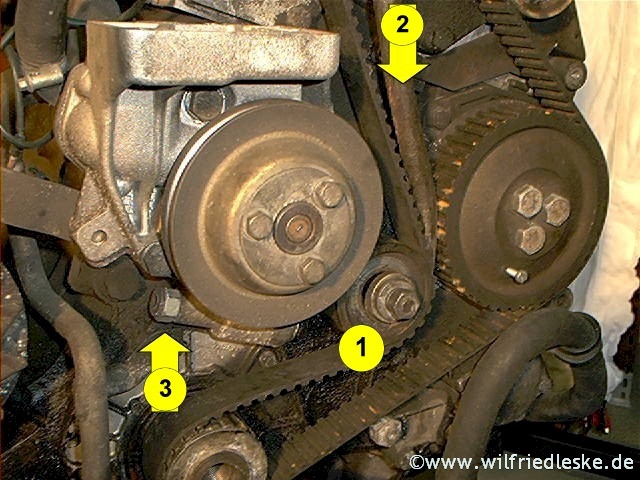
In the engine compartment, it is attached to the glow relay. You can see it spliced into the pink wire.
It looks like the alternator terminal only has one connector which has a red and black wire attached to it; I assume this is to give power to the alternator when the ignition is switched on.
Where would you suggest connecting the black wire?
Thanks,
Daniel
Antworten zu dsj1979
- Lollo_C
-
- startklar
- Administrator
-
- Hobby 600_Umbau
- Beiträge: 6143
- Thanks: 2978
Re: Charging the main battery
26 Jan. 2014 17:13 - 27 Jan. 2014 22:49
Hallo Daniel,
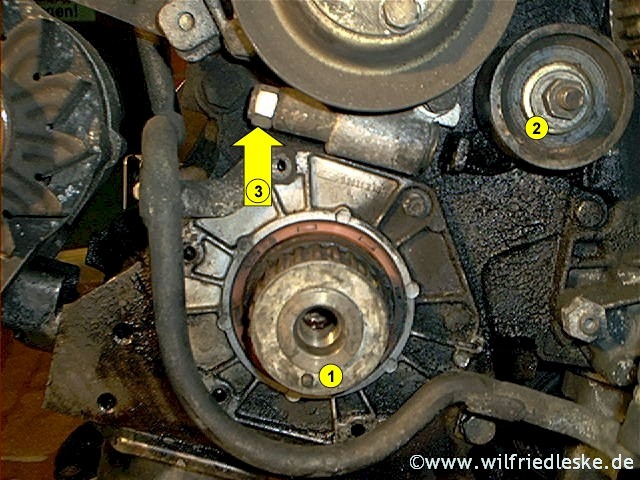
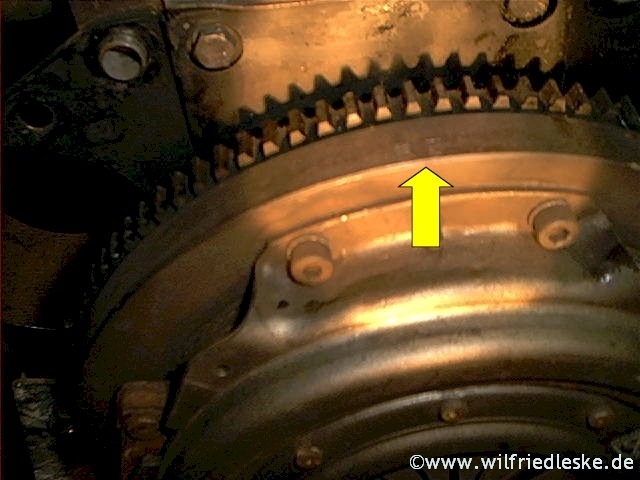
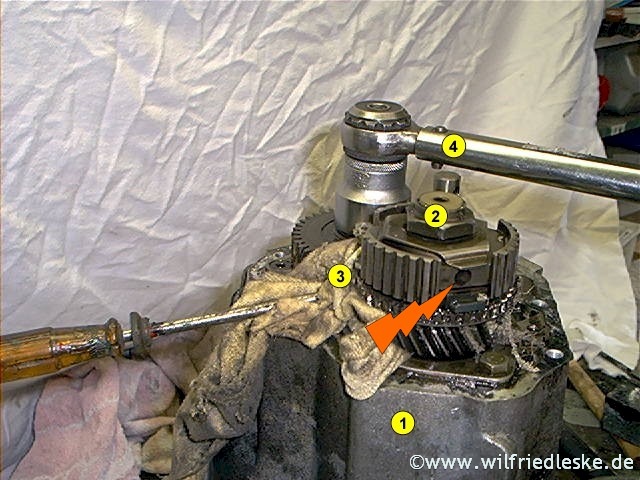
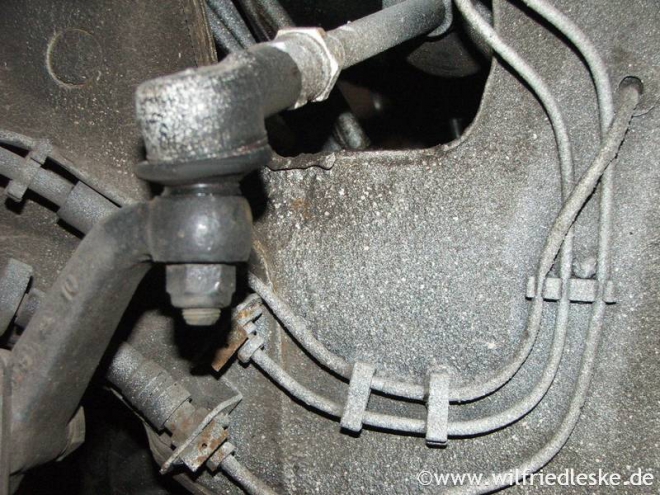
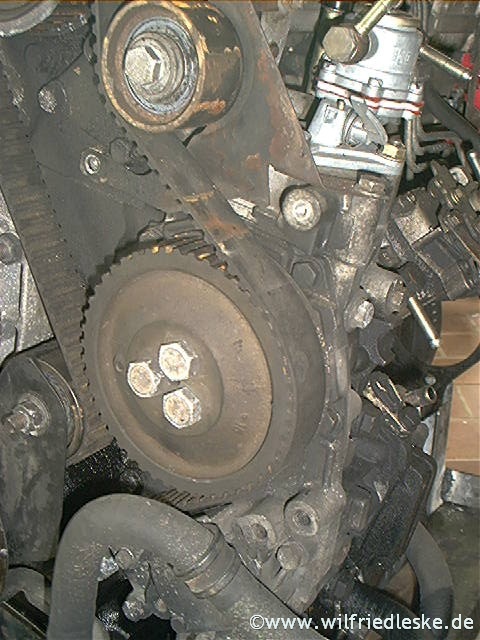
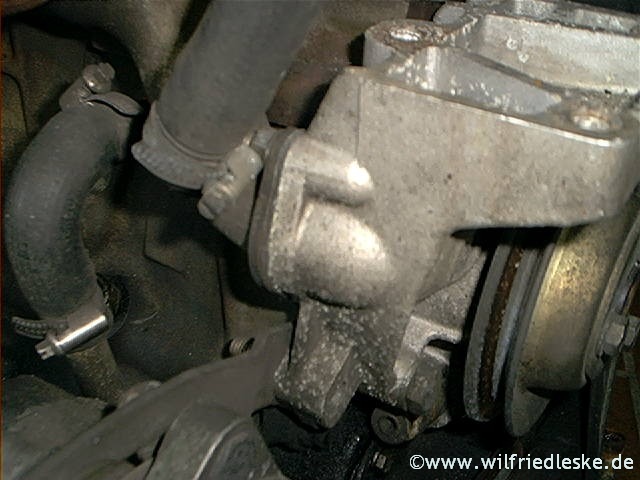
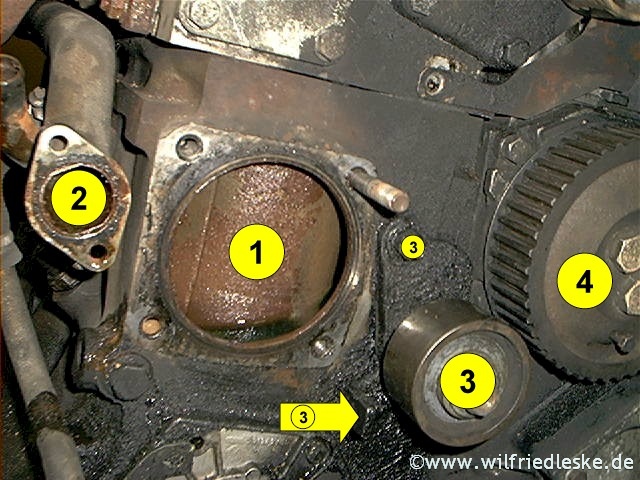
auf dem letzten Foto siehst Du den Anschluss der schwarzen Leitung an die Zündung. Auf dem Bild mit der Lichtmaschine kann ich nichts erkennen. Im Fotokatalog zum Basisfahrzeug findest Du dieses Bild der Magneti Marelli Lichtmaschine, so wie sie im Fiat verbaut ist. siehe Fotokatalog
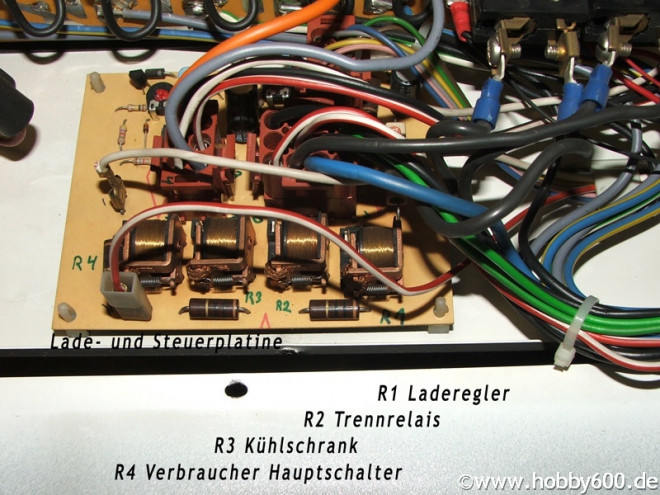
Was würde ich tun? Ich würde das original-Trennrelais außer Betrieb nehmen und ein Cyrix- Trennrelais einbauen. Das hat den Vorteil, dass die Fahrzeugbatterie mitgeladen wird, wenn der Hobby 600 an Landstrom hängt.
auf dem letzten Foto siehst Du den Anschluss der schwarzen Leitung an die Zündung. Auf dem Bild mit der Lichtmaschine kann ich nichts erkennen. Im Fotokatalog zum Basisfahrzeug findest Du dieses Bild der Magneti Marelli Lichtmaschine, so wie sie im Fiat verbaut ist. siehe Fotokatalog
Was würde ich tun? Ich würde das original-Trennrelais außer Betrieb nehmen und ein Cyrix- Trennrelais einbauen. Das hat den Vorteil, dass die Fahrzeugbatterie mitgeladen wird, wenn der Hobby 600 an Landstrom hängt.
Mit freundlichen Grüßen und Glückauf
Wilfried
Ich komme aus der alten Schule. Daher antworte ich nicht auf Fragen, die ohne Anrede und Gruß gestellt werden!
Wilfried
Ich komme aus der alten Schule. Daher antworte ich nicht auf Fragen, die ohne Anrede und Gruß gestellt werden!
Letzte Änderung: 27 Jan. 2014 22:49 von Lollo_C. Begründung: Link repariert
Antworten zu Lollo_C
- dsj1979
-
Themenstarter
- Offline
- Routinier
-
- Beiträge: 109
- Thanks: 6
- Lollo_C
-
- startklar
- Administrator
-
- Hobby 600_Umbau
- Beiträge: 6143
- Thanks: 2978
Re: Charging the main battery
26 Jan. 2014 18:05 - 26 Jan. 2014 18:06Nein, dann sind die Batterien dauernd verbunden! B+ ist direkter Pluspol der Batteriedsj1979 schrieb: There doesn't appear to be a D+ Will it work if I connect it to B+ ?
Teil 2 der Umbauanleitung abarbeiten!How would the new relay be installed?
Wichtig: Punkt 2e beachten!
Mit freundlichen Grüßen und Glückauf
Wilfried
Ich komme aus der alten Schule. Daher antworte ich nicht auf Fragen, die ohne Anrede und Gruß gestellt werden!
Wilfried
Ich komme aus der alten Schule. Daher antworte ich nicht auf Fragen, die ohne Anrede und Gruß gestellt werden!
Letzte Änderung: 26 Jan. 2014 18:06 von Lollo_C. Begründung: Nachsatz
Antworten zu Lollo_C
- dsj1979
-
Themenstarter
- Offline
- Routinier
-
- Beiträge: 109
- Thanks: 6
Re: Charging the main battery
26 Jan. 2014 18:13
Ah... Of course... my brain obviously isn't engaged at the moment! For now, I will put a switch in and manually turn it on and off. I'll order a Citrix Relay for the permanent solution though! Thanks for the diagram, I'll have a look through and try to figure it out. No doubt I'll be asking you many more questions though!
Many thanks,
Daniel
Many thanks,
Daniel
Antworten zu dsj1979
- dsj1979
-
Themenstarter
- Offline
- Routinier
-
- Beiträge: 109
- Thanks: 6
- dsj1979
-
Themenstarter
- Offline
- Routinier
-
- Beiträge: 109
- Thanks: 6
Re: Charging the main battery
26 Jan. 2014 23:52
With using the Citrix Relay, what needs to be done with the black wire that leads to 'D Lichtmasch'?
Thank you for pointing out 2E, I probably would have missed that. Do I read it correctly that the spring is removed from one of the relays to stop the relay activating? If that is the case, based on the fotos from your link, looking at the relays left to right 1 2 3 4, which relay do I remove the spring from?
Thanks,
Daniel
Antworten zu dsj1979
- Lollo_C
-
- startklar
- Administrator
-
- Hobby 600_Umbau
- Beiträge: 6143
- Thanks: 2978
Re: Charging the main battery
27 Jan. 2014 08:40
Hallo Daniel,
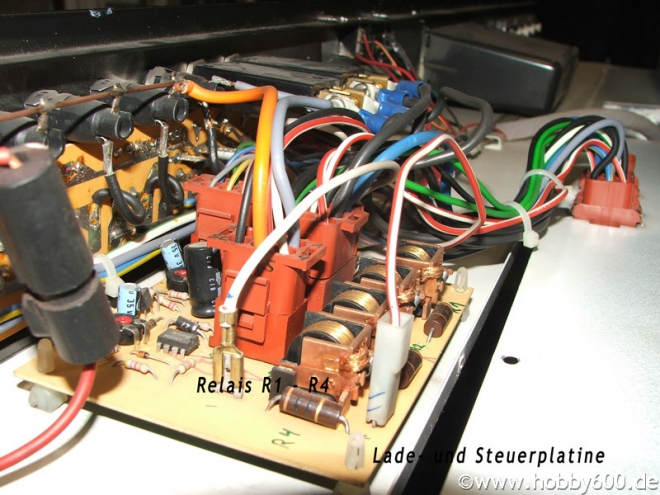
die schwarze Leitung muss angeschlossen bleiben, sonst arbeitet das Relais R3 für den Kühlschrank nicht.
Ich hatte Dir in den letzten Tagen mal einen Link zum Fotokatalog der Technik des Hobby 600 geschickt. Dort findest Du auch die Bezeichnung der Relais

So ein Frage- und Antwortspiel verleitet dazu, dass man nicht mehr selber denkt :evil:
die schwarze Leitung muss angeschlossen bleiben, sonst arbeitet das Relais R3 für den Kühlschrank nicht.
Ich hatte Dir in den letzten Tagen mal einen Link zum Fotokatalog der Technik des Hobby 600 geschickt. Dort findest Du auch die Bezeichnung der Relais
So ein Frage- und Antwortspiel verleitet dazu, dass man nicht mehr selber denkt :evil:
Mit freundlichen Grüßen und Glückauf
Wilfried
Ich komme aus der alten Schule. Daher antworte ich nicht auf Fragen, die ohne Anrede und Gruß gestellt werden!
Wilfried
Ich komme aus der alten Schule. Daher antworte ich nicht auf Fragen, die ohne Anrede und Gruß gestellt werden!
Antworten zu Lollo_C
- dsj1979
-
Themenstarter
- Offline
- Routinier
-
- Beiträge: 109
- Thanks: 6
Re: Charging the main battery
27 Jan. 2014 20:40
Ah, yes sorry. I find it difficult as I have to try to translate things which doesn't always work, it can sometimes be easy to miss the obvious. The forum automatically translates but pdf documents etc. I need to manually write out, and then still try to understand.
When you say the black wire should remain connected; just to confirm, it remains connected to the glow relay so it switches on with the ignition as it currently does?
Thanks,
Daniel
PS. Do you have a way to donate to the forum? Your help has been a god send!")
When you say the black wire should remain connected; just to confirm, it remains connected to the glow relay so it switches on with the ignition as it currently does?
Thanks,
Daniel
PS. Do you have a way to donate to the forum? Your help has been a god send!
Antworten zu dsj1979
- Lollo_C
-
- startklar
- Administrator
-
- Hobby 600_Umbau
- Beiträge: 6143
- Thanks: 2978
Re: Charging the main battery
27 Jan. 2014 20:43Hallo Daniel,dsj1979 schrieb: When you say the black wire should remain connected; just to confirm, it remains connected to the glow relay so it switches on with the ignition as it currently does?
Ja, das muss so verbunden bleiben, damit der Kühlschrank auf 12V nur bei eingeschalteter Zündung betrieben werden kann.
Mit freundlichen Grüßen und Glückauf
Wilfried
Ich komme aus der alten Schule. Daher antworte ich nicht auf Fragen, die ohne Anrede und Gruß gestellt werden!
Wilfried
Ich komme aus der alten Schule. Daher antworte ich nicht auf Fragen, die ohne Anrede und Gruß gestellt werden!
Antworten zu Lollo_C
- dsj1979
-
Themenstarter
- Offline
- Routinier
-
- Beiträge: 109
- Thanks: 6
Re: Charging the main battery
01 Feb. 2014 16:32
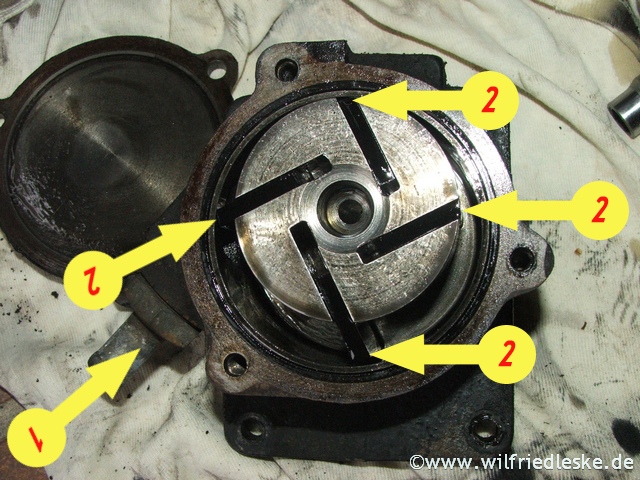
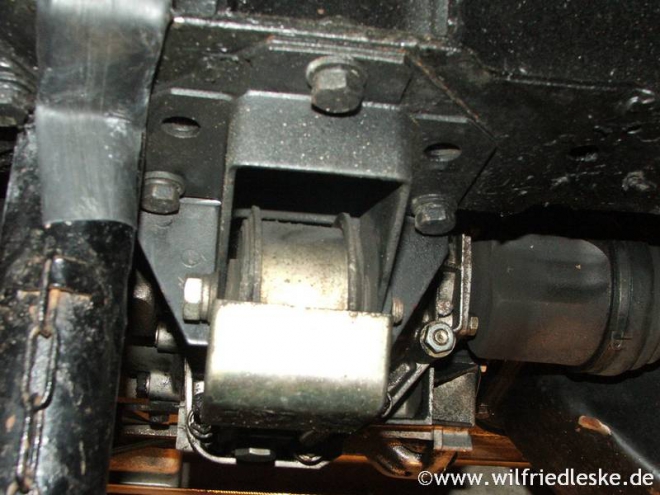
Sorry, more questions.... I'm in the process of fitting the Cyrix relay - it arrived this morning!
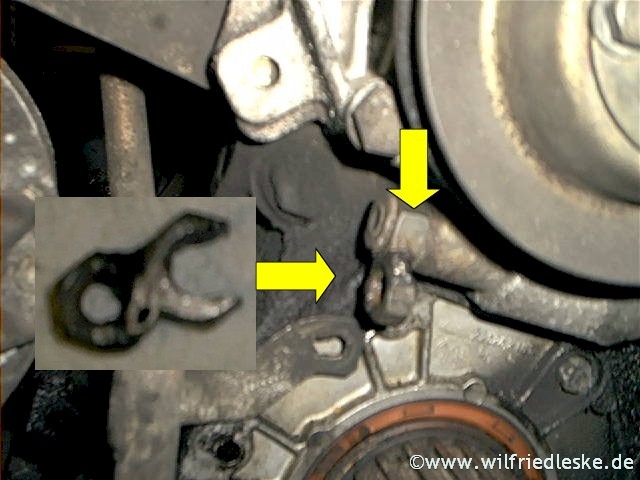
On your instructions 2e the message has become slightly lost in translation. I've removed the spring. Do I also need to cut the plate off where my pliars are pointing to?
Thanks,
Daniel
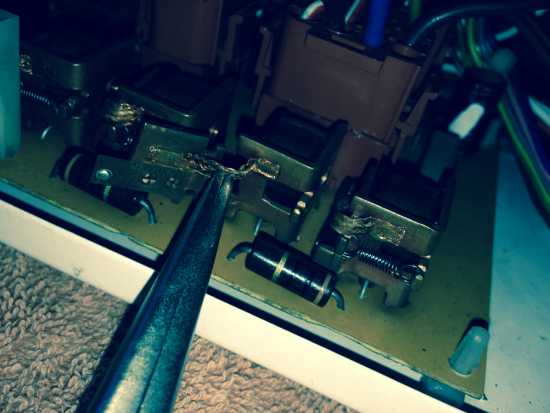
On your instructions 2e the message has become slightly lost in translation. I've removed the spring. Do I also need to cut the plate off where my pliars are pointing to?
Thanks,
Daniel
Antworten zu dsj1979
- Lollo_C
-
- startklar
- Administrator
-
- Hobby 600_Umbau
- Beiträge: 6143
- Thanks: 2978
- dsj1979
-
Themenstarter
- Offline
- Routinier
-
- Beiträge: 109
- Thanks: 6
Re: Charging the main battery
01 Feb. 2014 17:30
Great, thank you. I didn't want to cut it off incase that wasn't what the instructions meant.
I also got confused with the SA1 as there was no plug but I checked continuity and found it was connected to SB2 as per wiring diagram. Luckily I've ordered some multi connection plugs and one of the pins fits perfectly to SA1 so it's getting there!
I also got confused with the SA1 as there was no plug but I checked continuity and found it was connected to SB2 as per wiring diagram. Luckily I've ordered some multi connection plugs and one of the pins fits perfectly to SA1 so it's getting there!
Antworten zu dsj1979
Ladezeit der Seite: 0.397 Sekunden

